Welcome to Yongyi Fasteners, Your Reliable Fastener Supply Partner!

-
ProductsWe supply flat washers, spring washers, drop-in anchors, anchor bolts, hex nuts, hex bolts, sleeve anchors, threaded rods and OEM fastener products to DIN, BS, ANSI and MS standards.

-
About usHEBEI YONGYI FASTENERS MANUFACTURING CO.,LTD is located in China's largest fasteners production base Yongnian fasteners centre.
-
NewsHebei Yongyi Fasteners shares company updates, product knowledge and fastener industry news for global buyers.
-
ServiceThe products sold throughout the domestic and exported to Southeast Asia and Europe and other countries and regions. Our products win good reputation with domestic and foreign customers.



YONGYI FASTENERS
Support stable quality from material selection, processing and inspection to final delivery.
FOCUS ON HOT SPOTS


What to Look for When Selecting Drop In Anchors in 2026
Published:
2026-05-27
Author:
YONGYI FASTENERS
Select the ideal drop in anchor by matching load, material, and environment. Ensure correct installation for safety and durability in every project.
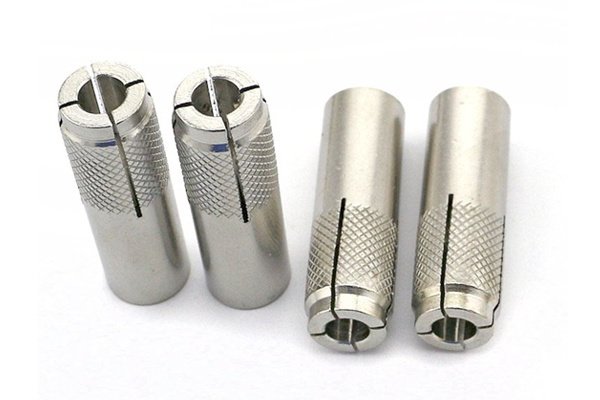
When you select a drop in anchor, you need to check that it matches your load needs, base material, and environment. Each drop in anchor works best for a specific job. You must use certified tools for every drop in anchor to make sure you get a safe fit.
Safety and durability always matter. If you pick the wrong drop in anchor or install it the wrong way, you risk failure. Always choose a drop in anchor you trust for strength and long life.
Check the drop in anchor size and type.
Make sure the drop in anchor suits your concrete or wall.
Use the right tools for your drop in anchor.
Drop In Anchor Selection Criteria
Load Requirements
Choosing the right anchors means knowing how much weight they must hold. You should find out if the weight will stay the same or change. This helps you pick anchors that will not break when you need them.
Static Loads
Static loads do not move or change. You see these loads with shelves, machines, or heavy things that do not move. For static loads, look at the anchor’s strength rating. Always check the maker’s data for each anchor. Some brands, like Fischer or Rawl, give charts for static load ratings. Wedge anchors work well for static loads in solid concrete. Do not go over the weight limit. Too much weight can make the anchor slip or crack the concrete.
Dynamic Loads
Dynamic loads move or change. You find these loads with gym gear, vibrating machines, or hanging things. Anchors for dynamic loads must handle shocks and movement. Wedge anchors can work, but check if they are rated for dynamic use. Some new anchors have shock-absorbing parts. These help lower stress on the concrete and anchor. Always ask your supplier for dynamic load ratings. If you guess the load, the anchor might fail.
Material Compatibility
Anchors must match the material you put them in. Most drop in anchors work best in concrete, but not all concrete is the same. There are anchors for other materials, but you must check if they fit.
Concrete Grades
Concrete comes in different grades. High-grade concrete gives anchors better grip and strength. Lower grades can break or crack under stress. Check your concrete grade before you put in anchors. Some makers, like Hilti, say the lowest concrete grade for each anchor. Wedge anchors need strong, uncracked concrete for best results. If you use anchors in weak concrete, they may not work well or last long.
Other Materials
Sometimes you need to put anchors in brick, stone, or block. Not all drop in anchors work in these materials. Some brands make special anchors for hollow or weak materials. Always read the box or ask your supplier. Using the wrong anchor can hurt the wall or make the anchor come out. Wedge anchors do not work well except in solid concrete. For other materials, use sleeve anchors or chemical anchors.
Environmental Factors
Where you put your anchors changes how long they last and how well they hold. You must think about where you will use the anchors and what they will face.
Indoor/Outdoor
Indoor anchors do not face much weather. You can use standard drop in anchors for most indoor jobs. Outdoor anchors must stand up to rain, frost, and sun. Corrosion-resistant anchors, like stainless steel ones, last longer outside. Some new brands have eco-friendly coatings that stop rust and help the planet. If you use wedge anchors outside, pick ones with a weatherproof finish.
Chemical Exposure
Some places have chemicals that can hurt anchors or concrete. You see this in factories, pools, or near salty roads. Chemicals can make the anchor and concrete weak. Always pick anchors with special coatings or made from chemical-resistant stuff for these places. Some makers test their anchors for chemical resistance and give certificates. Ask for these if you work in tough places.
Tip: Always check how deep you put the anchor and how close it is to the edge. If you do not set the anchor deep enough, it may not hold. Putting anchors too close to the edge can crack the concrete and make it weak. You should also check the load, especially for dynamic loads, to stop anchor failure.
A table can help you compare anchor choices for different places:
If you want to know how anchors work in your place, ask your supplier for test results or case studies. Some smaller brands, like Spit or EJOT, have special answers for hard jobs.
Installation Needs
Proper installation ensures your drop in anchors perform as expected. You must prepare the right tools and select the correct drill bit size. If you skip these steps, you risk anchor failure or unsafe results.
Tools Required
You need specific tools for drop in anchor installation. Start with a hammer drill. This tool creates a clean hole in concrete. Use a vacuum or brush to remove dust from the hole. Dust can stop the anchor from gripping well. You also need a setting tool. This tool helps you expand the anchor inside the hole. Some brands offer certified tensioning tools. These tools guarantee the anchor reaches the correct tension. If you use uncertified tools, you may not achieve a safe installation.
Tip: Always check the manufacturer’s instructions for tool recommendations. Certified tools improve safety and reliability.
Here is a simple checklist for tools:
Hammer drill
Vacuum or hole brush
Setting tool
Certified tensioning tool (if required)
Safety goggles and gloves
If you use the right tools, you make the installation process easier and safer. You also reduce the risk of mistakes.
Drill Bit Size
Choosing the correct drill bit size is vital for installation. Each anchor type needs a specific hole diameter. If you use the wrong size, the anchor may not fit or hold. Manufacturers list the required drill bit size on the packaging. You must follow these instructions.
A table can help you match anchor size to drill bit size:
Note: Always measure the hole depth. If the hole is too shallow, the anchor will not expand fully. If the hole is too deep, the anchor may spin or slip during installation.
You must check the drill bit for wear. A worn bit creates an uneven hole. This can weaken the anchor’s grip. Replace drill bits regularly to maintain quality installation.
If you follow these steps, you achieve a secure and durable installation. You protect your project from future problems.
Importance of Correct Anchor Choice
Picking the right anchors is important for every job. When you choose anchors that fit your needs, you keep people and things safe. You also stop expensive fixes and delays. Let’s see why your choice matters so much.
Safety
Structural Stability
You want your building to stay safe and strong. The right anchors hold shelves, machines, and fixtures in place. If you use the wrong anchors, things can move or even fall down. For example, if you do not put anchors deep enough or too close to the edge, the concrete can crack. This makes the whole structure weaker. Always follow the maker’s instructions for where and how deep to put anchors. This helps you get the best results and keeps your work safe.
Risk of Failure
If you pick the wrong anchors, you make failure more likely. This can cause bad accidents. The wrong anchors can make things wobbly, loose, or even fall off. You might see parts drop or shift. This can hurt people and break equipment. Always check the load rating and how to install before you start. If you are not sure, ask an expert or your supplier for help.
Tip: Use a checklist or picture guide to remember the main steps for anchor selection. Visual guides help you not make mistakes and keep things safe.
Durability
Material Quality
Anchors made from good materials last longer and work better. Look for anchors with strong steel or coatings that stop rust. These things help your anchors fight rust and damage. If you use cheap anchors, they might break or stop holding well over time. Always look for certificates or test results from the maker. This shows you can trust the anchors for your job.
Maintenance
You can make your anchors last longer by checking them often. Look at your anchors for rust, movement, or damage. If you see problems, change the anchors right away. Good installation also means fewer repairs. Clean holes, the right drill bit size, and certified tools all help your anchors last longer. You save time and money when you look after your anchors.
Remember: The right anchors help you feel calm. You know your job will stay safe and strong for a long time.
If you want to make choosing easier, try using a picture checklist or ask an expert. These steps help you not make mistakes and get the best results for your job.
Anchor Types in 2026
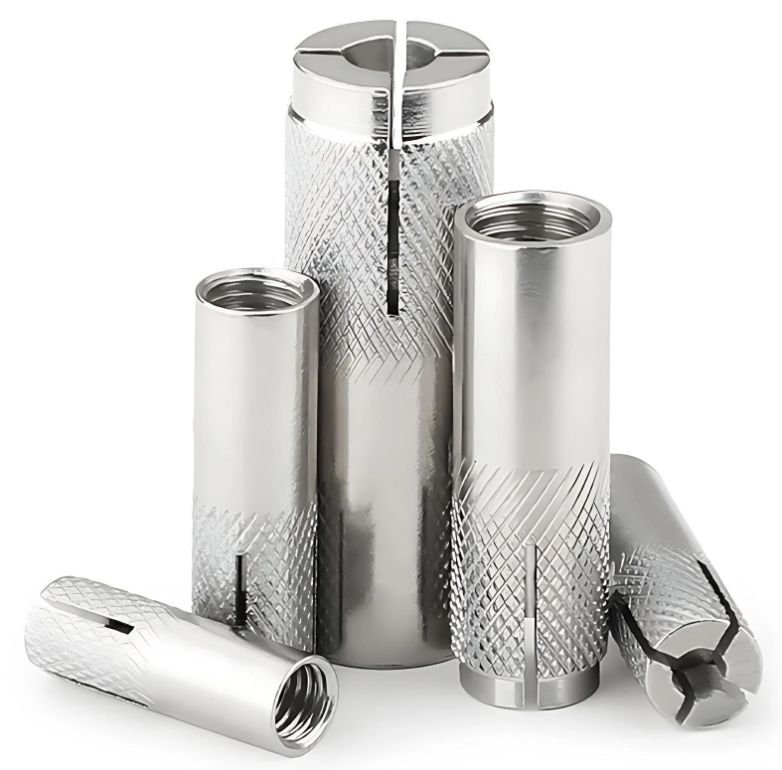
Standard Drop In Anchor
You will find the standard drop in anchor as the most common choice for everyday jobs. This anchor works well in solid concrete. You can use it for fixing light fixtures, cable trays, or small machines. The design is simple. You drill a hole, clean it, and set the anchor with a setting tool. Most brands, like Fischer and Rawl, offer these anchors in different sizes. You should always check the packaging for load ratings and installation steps.
Standard drop in anchors suit indoor use. They resist basic wear and tear. You will see them in schools, offices, and shops. If you want a reliable anchor for general tasks, this type is a safe pick. Some lesser-known brands, such as Spit, now offer colour-coded anchors. These help you match the anchor to the right drill bit size. You can ask your supplier for a sample to test before buying in bulk.
Tip: Use a simple infographic to show the installation steps for a standard drop in anchor. This helps you avoid mistakes.
Heavy-Duty Anchor
You need a heavy-duty anchor for bigger jobs. These anchors hold heavy machines, racking, or safety rails. The body is thicker and longer than standard types. You will see them rated for higher loads. Some heavy-duty anchors use special alloys for extra strength. Brands like Hilti and EJOT lead the market with their high-performance models.
Heavy-duty anchors often have extra features. Some have anti-rotation fins. These stop the anchor from spinning in the hole. Others use a double-expansion system. This gives you a stronger grip on cracked or old concrete. You should always check the technical sheet for load limits and safety margins. If you work on a project with strict rules, look for anchors with ETA (European Technical Assessment) certification.
A table can help you compare anchor types for heavy-duty use:
Corrosion-Resistant Anchor
You must choose a corrosion-resistant anchor for outdoor or harsh environments. These anchors use stainless steel or have special coatings. You will see them in car parks, bridges, or near the sea. Salt, water, and chemicals can damage normal anchors. Corrosion-resistant types last longer and keep your structure safe.
Some brands, like Mungo, offer anchors with eco-friendly coatings. These coatings protect the anchor and reduce harm to the environment. You can also find anchors tested for chemical resistance. Always ask for certificates if you work in a tough location. If you want to see how these anchors perform, look for case studies or test reports from trusted sources.
Note: A photo comparison of rusty and corrosion-resistant anchors can help you see the difference. This makes your choice easier.
You will find many types of anchors on the market. Each anchor type has a special use. You should also know about the types of wedge anchors, as they offer strong holding power for both static and dynamic loads.
Innovative Anchors
You will see many changes in drop in anchors by 2026. Makers now add smart features and eco materials to help you work faster and safer. These new anchors give you more control and help protect the planet.
Smart Features
Smart anchors make your job easier. You do not need special skills to use them. The design helps you get the best grip every time. Many smart anchors use new technology to improve safety and accuracy.
You can see how these features help in the table below:
You will find that these features help you finish jobs with less stress. You do not need to worry about the anchor failing. The anchor tells you when it is set right. Some brands even add colour indicators. These show you when the anchor is tight enough. If you want to see how it works, ask your supplier for a demo or look for a video guide.
Tip: Use an infographic to show each step of installing a smart anchor. This helps you remember the process and avoid errors.
Eco Materials
Eco materials are now common in drop in anchors. You can choose anchors made from recycled steel or low-carbon alloys. These materials help you lower your project’s impact on the environment. Some brands use coatings that do not harm nature. These coatings stop rust and last longer than old types.
You should look for anchors with eco labels. These labels show that the anchor meets green standards. If you work on a green building, you may need these anchors to pass inspection. You can also ask for test reports to see how the anchor performs over time.
Many suppliers now offer anchors in recycled packaging. This reduces waste on your site. You help the planet and meet new rules for eco-friendly building.
Note: Ask your supplier for a sample of eco anchors. You can test them before you buy in bulk.
You will see more smart and eco anchors in the future. These anchors help you work better and protect the world around you.
Selection Factors
Load Capacity
You need to check the load capacity before picking anchors. This helps stop accidents and keeps your project safe. You must know how much weight the anchor will hold. It is important to learn about static and dynamic loads. When using wedge anchors, always check their load ratings for both types.
Manufacturer Specs
Manufacturers give clear details for each anchor. You find these on the box or in technical sheets. These details show the most weight the anchor can take. Read these numbers with care. Wedge anchors have charts for different sizes and materials. Match the anchor to what your project needs.
Look for the highest load rating.
Check which concrete grade is best.
Pick the right anchor size for your job.
Tip: Always use anchors that meet or go above your load needs. If you guess, you could have a failure.
Some new products, like Hilti’s heavy-duty wedge anchors, have higher load ratings and special features. These anchors are good for big projects with strict safety rules.
Safety Margins
You must add safety margins to your plans. Safety margins protect you from surprise loads or changes. Never use anchors at their top load. Leave extra space for safety.
Add at least 25% to the maker’s load rating.
Use anchors with ETA certification for jobs with rules.
Do not mix anchor types in one project.
Note: For wedge anchors, always check the technical sheet for safety margins. This helps you avoid mistakes and keeps your structure strong.
Material Interaction
Anchors must work well with the base material. Test and check the material before you start. If you use wedge anchors in concrete, know the grade and condition of the concrete.
Testing
Testing shows how anchors act in different materials. You can use load testing to check how anchors perform. Cementation Skanska uses load testing on piles, pushing and watching with special tools. This shows how the ground and anchor work together. For repairs, cleaning the surface is key. You use abrasive blasting to clean it. Then you do pull-off testing to check how well it sticks. Shore hardness testing checks if the resin has set.
Test the anchor in the real material.
Use pull-off tests to check sticking.
Check hardness after fixing.
Tip: Always test anchors in the real place. This helps you avoid surprises and makes sure the anchor holds well.
Certification
Certification proves anchors meet strict rules. You must use certified anchors for jobs with rules. Certification checks performance, safety, and fit. You find these in technical sheets and certificates.
Check the certificate before you start. For wedge anchors, look for ETA or NF EN 795 certificates. These show the anchor meets safety rules.
Callout: Certified anchors help you pass checks and avoid fines. Always ask your supplier for certificates.
Environmental Suitability
Anchors must fit the place where you use them. Check for corrosion resistance and temperature limits. If you use wedge anchors outside, pick ones with weatherproof coatings.
Corrosion Resistance
Corrosion resistance keeps anchors strong in tough places. Use stainless steel or coated anchors for outdoor jobs. If you work near salt or chemicals, use anchors with special coatings. These coatings protect the anchor and make it last longer.
Pick anchors with eco-friendly coatings.
Use stainless steel for wet or salty places.
Check for chemical resistance certificates.
Tip: Compare anchors with and without corrosion resistance. You will see the difference in how long they last.
Temperature
Temperature changes how anchors work. Check the temperature range for each anchor. Some anchors work well in very hot or cold places. If you use wedge anchors in cold weather, check for frost resistance. High heat can make some materials weak.
Check the anchor’s temperature rating.
Use anchors tested for tough conditions.
Do not use anchors outside their rated range.
Note: Always ask your supplier for temperature test results. This helps you avoid problems and keeps your project safe.
You must think about load, material, and environment together. If you follow these steps, you will pick the right anchors for every job. You avoid mistakes and make your installation safe and strong.
Installation Process
A good installation process helps you get the best results from your drop in anchors. You need to follow each step with care. If you rush or skip steps, you risk weak anchors and unsafe fittings. Let’s look at how you can install drop in anchors the right way.
Step Overview
You can follow these steps for a safe and strong anchor:
Mark the Spot
Use a pencil or marker to show where you want to place the anchor. Double-check your measurements before you start drilling.
Drill the Hole
Pick the correct drill bit size for your anchor. Use a hammer drill to make a clean, straight hole. The hole must be deep enough for the anchor to fit fully.
Clean the Hole
Dust and debris can stop the anchor from gripping. Use a vacuum or a brush to clear out the hole. This step makes a big difference in holding power.
Insert the Anchor
Place the anchor into the hole. Tap it gently with a hammer until it sits flush with the surface.
Set the Anchor
Use a setting tool to expand the anchor inside the hole. Some modern anchors have colour indicators to show when they are set correctly.
Attach the Fixture
Line up your bracket or fixture with the anchor. Insert the screw or bolt and tighten it. Do not over-tighten, as this can damage the anchor.
🛠️ Tip: You can use an infographic to show each step of the installation process. Visual guides help you remember the order and avoid missing steps.
Common Errors
Many people make mistakes during anchor installation. These errors can lead to weak fittings or even failure. You can avoid most problems by knowing what to watch for.
Here is a table of common errors, what they mean, and how you can fix them:
You can see that most errors come from rushing or not following the instructions. If you take your time and check your work, you will get a much safer result.
⚠️ Note: Always read the instructions before you start the installation process. If you are unsure, ask a supplier or expert for help.
You can avoid most problems by planning ahead and using the right tools. A checklist or step-by-step guide can help you remember each part of the installation process. If you want to make your work even safer, use certified tools and check your anchors every few months.
Drop In Anchor Installation
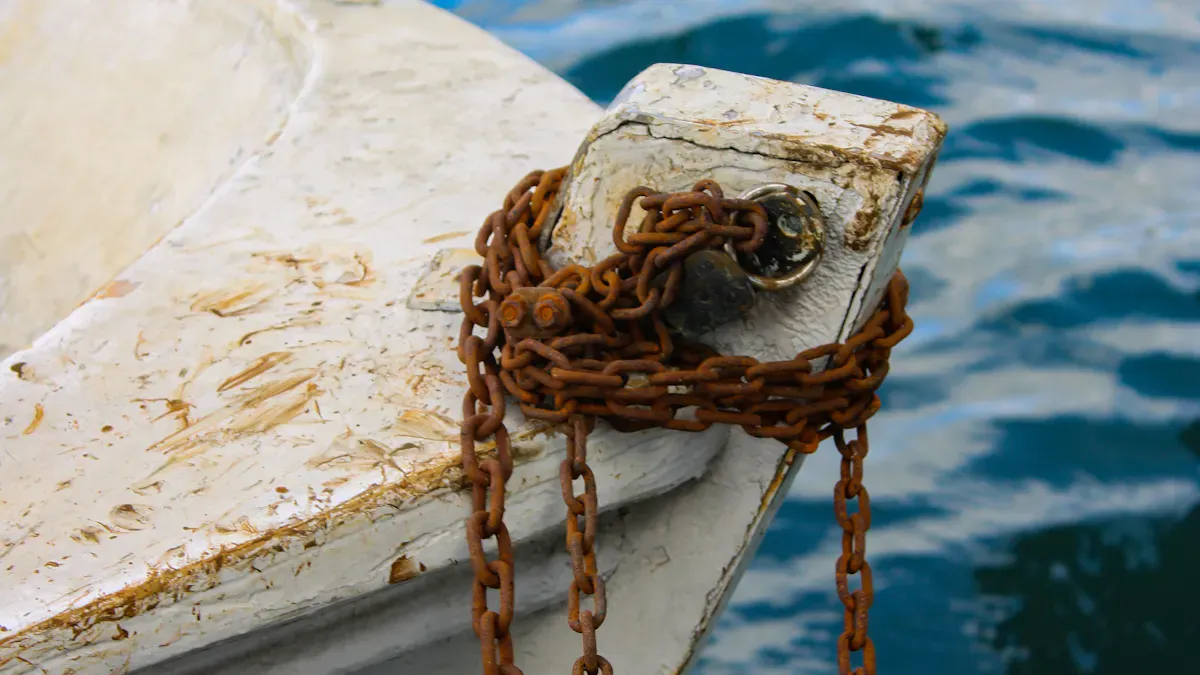
You need to follow a clear process for anchor installation. This helps you achieve correct installation every time. If you skip steps or use the wrong tools, you risk weak fittings and unsafe results. Let’s break down the process into simple steps.
Preparation
Before you start, you must prepare the site and tools. Good preparation leads to correct installation and strong anchors.
Clean Hole
You should always clean the hole after drilling. Dust and debris can stop anchors from gripping the concrete. Use a vacuum or a hole brush to remove all loose material. If you leave dust inside, the anchor may slip or fail. Clean holes help you get the best hold and make the anchor installation safer.
Tip: Use a small brush or compressed air to reach the bottom of the hole. This ensures no dust remains.
Correct Drill Bit
You must use the right drill bit size for your anchors. Check the packaging or technical sheet for the correct size. If you use a bit that is too large, the anchor will not grip. If the bit is too small, you cannot insert the wedge anchor. Always measure the hole depth as well. The hole must be deep enough for the anchor to sit flush with the surface.
A simple infographic can help you match drill bit sizes to anchor types. This makes correct installation easier and faster.
Secure Installation
Once you have prepared the hole, you can move to the next steps. Secure installation means you follow each instruction and use the right tools.
Certified Tools
You should always use certified tools for anchor installation. Certified tools help you achieve the correct installation torque and expansion. For wedge anchors, use a setting tool to expand the anchor inside the hole. Some modern tools have indicators that show when you have reached the right tension. This reduces mistakes and improves safety.
Note: Certified tools also help you pass inspections and meet building standards.
Avoid Spinning Screws
You must avoid spinning screws during installation. If you over-tighten or use the wrong tool, the anchor can spin in the hole. This weakens the grip and can cause failure. Insert the wedge anchor gently, then tighten the screw or bolt until it is snug. Do not force it. If you notice the anchor spinning, stop and check the hole and anchor size.
🛠️ Tip: Use a torque wrench for final tightening. This helps you avoid over-tightening and ensures correct installation.
You can follow these steps for every anchor installation:
Mark the spot for the anchor.
Drill the correct size hole.
Clean the hole well.
Insert the wedge anchor to the right depth.
Use a setting tool to expand the anchor.
Attach your fixture and tighten the screw carefully.
If you follow these steps, you will achieve strong and safe results with all anchors. You can also use a checklist or infographic to help you remember each part of the process.
Practical Tips & Checklist
Decision Guide
You want to pick the right drop in anchor. A clear guide helps you not make mistakes. It also keeps your project safe. First, think about your job. What will the anchor hold? Where will you put it? What will the anchor face? These questions help you decide.
Follow these steps to help you choose:
Find out if the load is static or dynamic.
Check if the base is solid concrete, brick, or stone.
Think about the environment. Will there be water, chemicals, or heat?
Pick the anchor type. Is it standard, heavy-duty, or corrosion-resistant?
Choose the size and length that fits your needs.
Get the right tools and drill bit ready.
Plan to check and look after the anchors often.
📝 Tip: Use a checklist or picture guide to help you remember each step. Visual guides make it easier to follow the process.
Questions to Ask
Asking good questions helps you not make costly mistakes. Before you buy or use any anchor, think about these points:
What is the most weight this anchor must hold?
Does the anchor have the right certificate for my job?
Is the anchor right for the base material?
Will the anchor stand up to rust or chemicals here?
What drill bit size and way of installing should I use?
Are there special rules from the maker?
How often do I need to check and look after the anchor?
Think about the future too. Will the anchor face changes in heat or water? Does the place have special safety rules? These questions help you pick anchors that last and work well.
Consulting Experts
You do not have to decide by yourself. Talking to an expert or supplier can save you time and stop problems. Experts know about new products and rules. They can help you pick the right anchor and explain hard details.
When you talk to an expert, bring your project details. Show them the load, base material, and environment. Ask about certified tools and how to install. Many suppliers give sample anchors or show videos. These help you learn the steps and not make mistakes.
💡 Note: The Royal Yachting Association (RYA) and Maritime and Coastguard Agency (MCA) give rules for safe anchoring. Following these rules makes things safer and more reliable.
You can also learn from real examples. Look for case studies or photos of jobs like yours. Infographics and step-by-step guides make hard things easy to understand. If you are not sure, always ask for help before you start.
Reviewing Examples
You can learn a lot by looking at real examples before you choose your drop in anchors. Examples show you what works and what does not. They help you see the results of good planning and careful installation. You can avoid common mistakes by studying projects like yours.
Start by searching for case studies from trusted brands or suppliers. Many companies share stories about anchor installations in schools, offices, or outdoor spaces. These stories often include photos, diagrams, or even short videos. You can see the type of anchor used, the base material, and the final result. This helps you picture your own project and spot any risks.
Tip: Ask your supplier for example projects or installation guides. Many suppliers have booklets or online galleries with step-by-step photos.
You can also use tables to compare different anchor choices in real jobs. Here is a simple example:
When you review examples, look for these details:
The anchor type and size
The base material (concrete, brick, stone)
The environment (indoor, outdoor, wet, dry)
Any special tools or steps used
The outcome after months or years
You can learn from both good and bad examples. If you see a project where anchors failed, check what went wrong. Maybe the installer used the wrong drill bit or skipped cleaning the hole. These lessons help you avoid the same errors.
📝 Note: Infographics and step-by-step guides make examples easier to understand. You can print these guides or save them on your phone for quick checks on site.
You should also talk to people who have done similar jobs. Ask them what worked best and what they would do differently next time. Real stories give you honest advice that you might not find in manuals.
If you want to build your own checklist, use examples as a guide. Write down the steps that led to success. Mark the tools and anchor types that worked well. This way, you create a plan that fits your project.
By reviewing examples, you gain confidence in your choices. You see what to expect and how to get the best results. You also show inspectors or clients that you have done your homework and care about safety.
You need to choose drop in anchors with care. Focus on these key points:
Match the anchor to your load and base material.
Check the environment for rust or chemicals.
Use the right tools and follow each installation step.
Tip: Use the checklist and ask an expert if you face a complex project. Infographics can help you remember each step and avoid mistakes. Safety and durability always come first.
FAQ
What is a drop in anchor?
A drop in anchor is a metal sleeve you set into concrete. You use it to hold bolts or threaded rods. It expands inside the hole to grip tightly. You often use it for fixing heavy items to solid surfaces.
Can I use drop in anchors in brick or stone?
You should not use standard drop in anchors in brick or stone. These anchors work best in solid concrete. For brick or stone, choose sleeve or chemical anchors. Always check the packaging or ask your supplier for the right type.
How do I know which size anchor to use?
You match the anchor size to your load and fixture. Check the manufacturer’s chart for load ratings and drill bit sizes. If you feel unsure, ask your supplier for help or use an infographic to guide your choice.
What tools do I need for installation?
You need a hammer drill, the correct drill bit, a setting tool, and safety gear. Some jobs require a certified tensioning tool. Always clean the hole before you insert the anchor. A simple checklist can help you remember each tool.
How can I avoid anchor failure?
You avoid failure by following the instructions. Use the right anchor for your material and load. Clean the hole well. Do not over-tighten the screw. Regularly check your anchors for signs of rust or movement.
Are there corrosion-resistant options for outdoor use?
Yes, you can choose stainless steel or coated anchors for outdoor or wet places. These resist rust and last longer. Look for eco-friendly coatings if you want to protect the environment. Ask your supplier for certificates or test results.
How often should I inspect installed anchors?
You should check your anchors every six months. Look for rust, movement, or damage. Tighten loose screws and replace damaged anchors. Use a simple inspection checklist or infographic to help you remember each step.
Where can I find installation guides or examples?
You can find guides and examples on supplier websites or in product booklets. Many brands offer step-by-step infographics or videos. Ask your supplier for real project photos or case studies to see how anchors work in different jobs.
Get Quote
Welcome To Know Our Products
Get Product and Service Information
Follow us
We provide OEM service and focus on stable quality, competitive pricing and responsive export support.


Contact Info
Add:Dongmingyang Industrial Park, Mingguan Town, Yongnian District, Handan City, Hebei Province China
Export salesman:
WhatsApp:+86 18830064300
E-mail: sales@hgtfix.com
Export salesman:
WhatsApp
+86 18830064300
E-mail:
Copyright © 2022 HEBEI YONGYI FASTENERS MANUFACTURING CO.,LTD Power by 300.cn | SEO