Welcome to Yongyi Fasteners, Your Reliable Fastener Supply Partner!

-
ProductsWe supply flat washers, spring washers, drop-in anchors, anchor bolts, hex nuts, hex bolts, sleeve anchors, threaded rods and OEM fastener products to DIN, BS, ANSI and MS standards.

-
About usHEBEI YONGYI FASTENERS MANUFACTURING CO.,LTD is located in China's largest fasteners production base Yongnian fasteners centre.
-
NewsHebei Yongyi Fasteners shares company updates, product knowledge and fastener industry news for global buyers.
-
ServiceThe products sold throughout the domestic and exported to Southeast Asia and Europe and other countries and regions. Our products win good reputation with domestic and foreign customers.



YONGYI FASTENERS
Support stable quality from material selection, processing and inspection to final delivery.
FOCUS ON HOT SPOTS


A Complete Guide to Installing and Replacing Wheel Lug Nuts
Published:
2026-05-06
Author:
YONGYI FASTENERS
Step-by-step guide for installing and replacing wheel lug nuts safely. Learn proper tools, torque, and tips to prevent loose wheels and rust issues.
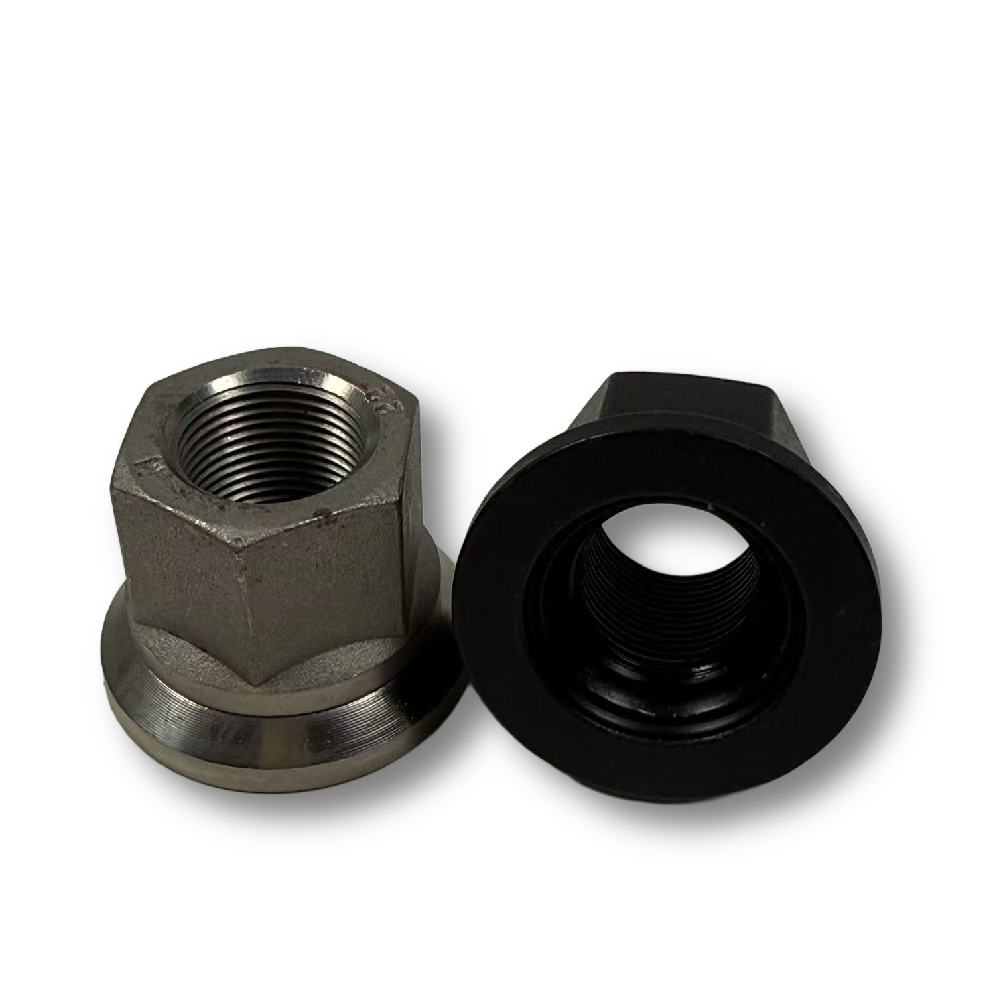
You need safe wheel lug nuts every time you drive. If you put them on wrong, it can be very dangerous. Here are some problems that can affect your safety:
If you pick Wheel Hub Nut from YONGYI FASTENERS, you get top quality. These nuts meet ISO 9001 and IATF 16949 rules, pass strength tests, and do not rust easily. You can count on them to work well every day or in tough situations.
Tools for Wheel Lug Nuts
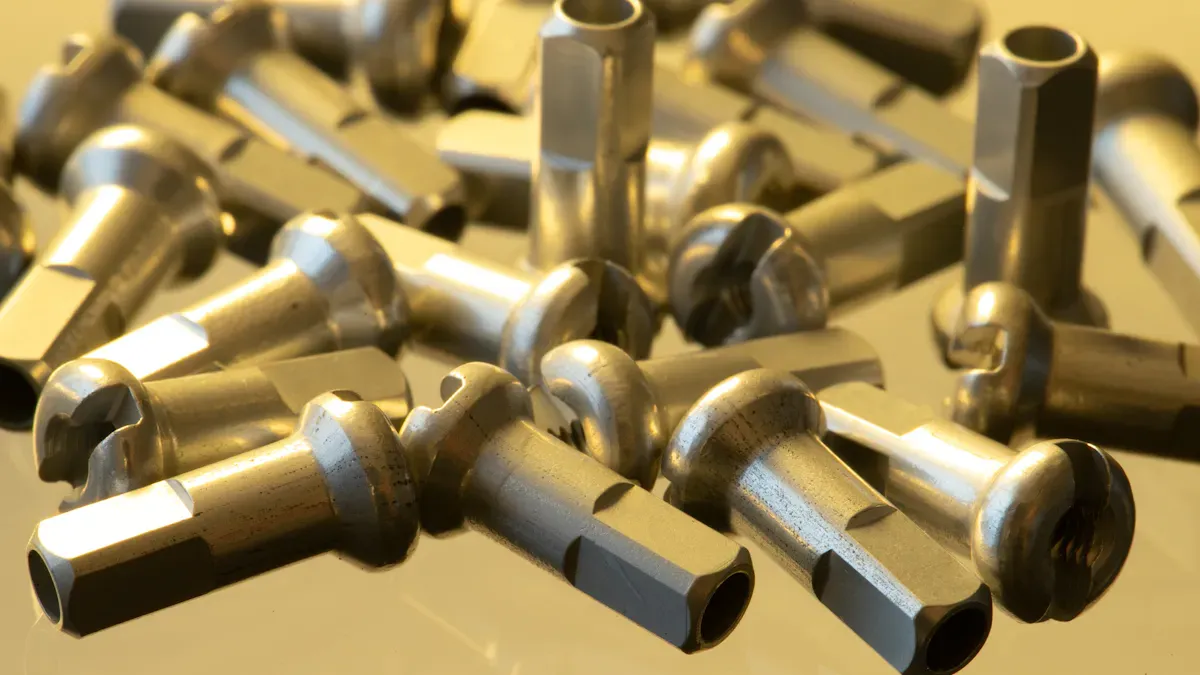
Choosing the right tools helps you install and replace wheel lug nuts safely. You need strong tools that can handle the force needed for this job. You also need materials that keep your wheels secure and prevent problems like rust or loose nuts.
Essential Tools
Socket Set
A socket set lets you remove and install lug nuts easily. You should pick a set with thick and heavy sockets. These sockets resist cracking when you apply force. The best sets have a secure connection mechanism. Sockets, extenders, and ratchets lock together so you do not slip or lose grip. You need sockets that handle intense torque. This feature is important for wheel lug nut installation.
Torque Wrench
A torque wrench helps you tighten lug nuts to the correct level. You avoid over-tightening or under-tightening. This tool gives you consistent clamping force. You reduce mechanical stress on the wheel and studs. Always check the torque setting for your vehicle. Using a torque wrench keeps your wheels safe and prevents damage.
Jack and Stands
You need a jack to lift your vehicle. Jack stands hold the vehicle steady while you work. Never rely on a jack alone. Jack stands prevent accidents and keep you safe. Place them under strong points of the frame. Make sure the ground is flat and solid.
Gloves and Safety Gear
Wear gloves to protect your hands from sharp edges and dirt. Safety glasses shield your eyes from debris. You stay safe and comfortable while working.
Materials Needed
Replacement Lug Nuts
Choose replacement lug nuts made from premium alloy steel. The Wheel Hub Nut from YONGYI FASTENERS uses high-strength materials and advanced anti-corrosion treatments. These nuts resist rust and wear. You get reliable performance in all conditions. Always match the size and thread pitch to your vehicle.
Anti-Seize Compound
Apply anti-seize compound to the threads. This prevents nuts from sticking or seizing. You make future removal easier and protect against rust.
Wheel Cleaner
Clean the wheel hub and nut surfaces before installation. Dirt, rust, or paint debris can affect torque readings. You get a secure fit and accurate tightening. Use a wheel cleaner to remove all contaminants.
Tip: Always check for washers if your vehicle uses them. Washers help distribute force and protect surfaces. Clean washers before reusing them.
You need the right tools and materials for a safe and long-lasting wheel lug nut installation. Using high-quality products and keeping surfaces clean helps you avoid common problems and keeps your wheels secure.
Installation Guide: Step-by-Step Process
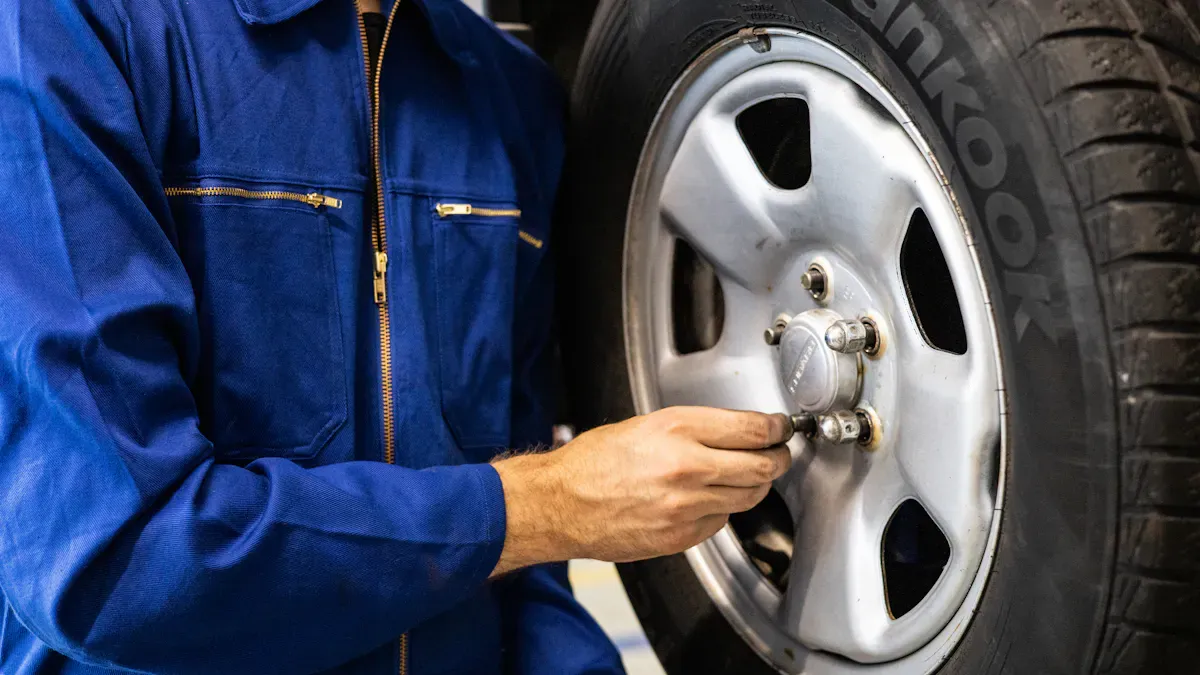
This installation guide gives you a clear step-by-step process for replacing and installing wheel lug nuts. You will learn how to prepare, remove old nuts, and install new nuts safely. Following the right installation protocol helps keep your wheels secure and your vehicle safe.
Preparation
Safety Precautions
You must always put safety first before working on your vehicle. Park your car on a flat, solid surface. Engage the parking brake. Place wheel chocks behind the tires that will stay on the ground. Wear gloves and safety glasses to protect your hands and eyes from sharp edges and debris. Never work under a vehicle supported only by a jack.
Inspecting Lug Nuts and Wheels
Before you start, inspect your wheel lug nuts and wheels carefully. Look for signs of rust, swelling, or damage. Swollen nuts can be hard to remove, especially on some vehicles like Jeeps. Use a tread depth gauge to check each tire. Walk around your vehicle and look for sidewall damage, exposed cords, or flat-and-rolling duals. Check for rust trails around the lug nuts. Do not rely only on what you see—feel for any looseness or irregularities.
Use a tread depth gauge on each tire.
Walk around to check for sidewall damage, exposed cord, and flat-and-rolling duals.
Look for rust trails around lug nuts.
Avoid relying solely on visual inspection.
If you notice any issues, address them before you continue. This step helps prevent problems during removal and installation.
Removing Lug Nuts
Loosening with Correct Tools
Start by using the correct socket size for your wheel lug nuts. A breaker bar or a sturdy wrench gives you better leverage. Turn each nut counterclockwise to loosen nuts, but do not remove them completely yet. If you find swollen or stuck nuts, use a penetrating oil and let it soak for a few minutes. For stubborn nuts, a lug nut removal tool or a special socket may help. Jeep owners often face swollen nuts, so check your sockets fit snugly.
Lifting Vehicle Safely
Once you have loosened the nuts, you need to lift your vehicle. Always follow safety guidelines when lifting a vehicle.
Position the jack under the manufacturer’s recommended lift point. Raise the vehicle until the tire is off the ground. Place jack stands under the frame or axle. Lower the vehicle onto the stands and check for stability before you continue.
Removing Wheel
Now, finish removing the loosened nuts by hand or with your wrench. Set the nuts aside if you plan to reuse them, or discard them if you will install new nuts. Carefully pull the wheel straight off the hub. If the wheel sticks, tap it gently with a rubber mallet.
Installing Wheel Lug Nuts
Hand-Tightening
Before you install new nuts, clean the wheel hub and lug nut surfaces. Dirt, brake dust, and grime can affect how the nuts seat and how much torque you apply. Clean surfaces help prevent corrosion and ensure proper tightening.
Cleaning wheel and lug nut surfaces removes contaminants like brake dust and grime, which can affect both appearance and functionality.
Clean surfaces ensure better adhesion, preventing issues such as corrosion.
Proper cleaning helps avoid improper torqueing of lug nuts, which is crucial for safety.
Check that the new nuts match the size and thread pitch of your vehicle. Place the wheel back onto the hub, lining up the holes with the studs. Thread each nut onto the stud by hand. This step helps prevent cross-threading and ensures a proper fit.
Using Torque Wrench
After you hand-tighten all the nuts, use a torque wrench to tighten them to the manufacturer’s recommended specification. You can find this information in your vehicle’s manual or from reputable sources like the Tire Industry Association. Proper torque keeps the wheel secure and prevents damage to the studs. Do not use an impact wrench for final tightening, as it can over-tighten or strip the threads.
Star Pattern Tightening
Tighten the nuts in a star or crisscross pattern. This method distributes pressure evenly across the wheel and helps seat it properly against the hub. Start with one nut, then move to the nut directly across from it, and continue until all nuts are tight. Repeat the pattern with your torque wrench to confirm each nut is at the correct torque.
Tip: After driving 50 to 100 miles, recheck the tightness of your wheel lug nuts. This step ensures they remain secure after the initial installation.
By following this installation guide and using the correct installation protocol, you reduce the risk of loose wheels, vibrations, or wheel detachment. Always check the fit and cleanliness of all parts before you install new nuts. This careful approach keeps your wheels safe and your vehicle running smoothly.
Safety Tips for Wheel Lug Nuts
Correct Torque
You must tighten wheel lug nuts to the right torque. This keeps your wheels safe and stops damage. The correct torque depends on your vehicle. You can find the right number in your owner's manual. Groups like the Tire Industry Association and SAE International also give this information. Here is a table with common torque values:
Over-Tightening Risks
If you tighten lug nuts too much, you can cause big problems. Here are some dangers:
Wheel studs can break or stretch.
Brake rotors or drums can bend.
Wheels can shake or wobble.
Tires and wheels can come off.
You can lose control of your car.
You might get stuck on the side of the road.
Always use a torque wrench and follow the right settings. Tightening too much can cost a lot to fix and is not safe.
Under-Tightening Risks
If you do not tighten lug nuts enough, wheels may not stay on. Loose nuts can make the wheel shake or fall off. You could lose control of your car. Not tightening enough can also cause emergencies on the road. Always check that each nut is tight and secure.
Rechecking Tightness
After you put on new lug nuts, you need to check them again. Drive your car for 50 to 100 miles. Then use a torque wrench to check each nut. This step helps you find any nuts that got loose from movement or bumps. Experts like the Tire Industry Association say this is important for safety.
Tip: Always check lug nut tightness after any wheel work.
Maintenance
Cleaning and Inspection
Regular care keeps your lug nuts safe and working well. Clean them every two weeks. Take off brake dust, salt, and dirt to stop rust. Put on a protective coating like ceramic or wax to block water. Keep your tire pressure right so the nuts do not get too much stress. Rotate your tires often so they wear evenly. Look at your lug nuts every oil change. Watch for small cracks or damage.
Clean every 2 weeks to stop rust and damage.
Use a coating to keep out water and dirt.
Keep tire pressure right for even stress.
Rotate tires often to help the nuts last.
Check nuts every oil change for early damage.
These steps help keep your wheels safe and working well. For more tips, visit the Tire Industry Association or SAE International.
Troubleshooting Wheel Lug Nuts
When you work on your wheels, you may face problems with lug nuts. Knowing how to spot and fix these issues helps you make a safe change and avoid bigger repairs.
Swollen or Damaged Nuts
Identifying Issues
Swollen or damaged lug nuts are common, especially on vehicles with two-piece nuts. General Motors has even issued a Technical Service Bulletin about this problem. The outer stainless cap can crack or swell when moisture gets inside. Over time, road salt and water cause the steel inside to rust and expand. This makes the cap look mushroomed or misshapen. You may see rust stains around the base. Sometimes, your lug wrench or socket will not fit, or the cap may spin freely. These signs mean you need to change the nut before it causes more trouble.
Lug wrench or socket does not fit the nut.
The cap looks rounded or swollen.
Rust stains appear at the base.
The cap spins but does not loosen the nut.
If you notice any of these, plan to change the affected nuts as soon as possible.
Removal Tools
You can use special tools to remove swollen or damaged nuts. Start with a slightly larger socket, like a 12-point 22mm, and tap it onto the nut. Some mechanics use flip sockets with half sizes for a better fit. If the cap spins or will not come off, use a hammer and chisel to cut the cap and expose the steel nut underneath. Once you reach the steel, you can use a smaller socket to finish the change. Always wear safety glasses during this process.
Cross-Threading
Prevention
Cross-threading happens when you do not align the nut and stud correctly. This can damage both parts and make the next change harder. To prevent this, always start each nut by hand. Turn it a few times to make sure it goes on smoothly. If you feel resistance, stop and check the alignment. Use a torque wrench to finish tightening. After you drive a short distance, recheck the torque to make sure the nuts have not loosened. This method follows best practices from the Tire Industry Association.
Start each nut by hand for proper alignment.
Use a torque wrench to reach the correct tightness.
Recheck torque after a short drive.
Correction
If you cross-thread a nut, you need to change it right away. Remove the nut and inspect the stud. If the threads look damaged, use a thread chaser or tap and die set to clean them. If the damage is too deep, you must change the stud. Never force a nut onto a damaged stud, as this can cause it to break during your next change.
Broken Studs
Repair Options
Broken studs can happen if you over-tighten, cross-thread, or work with rusty parts. Here is a table showing common causes and what they mean:
If you break a stud, you need to change it before you drive again. Use a stud press or a hammer and punch to remove the broken piece. Install a new stud and torque it to the manufacturer’s specification. If the hub or bearing is damaged, you may need to change the whole assembly.
Tip: Regular inspection and careful installation help you avoid most lug nut and stud problems. Make every change with attention to detail for safer driving.
Choosing Wheel Lug Nuts
Picking the right wheel lug nuts is important. It keeps you safe and helps your car work well. You need to know about different types and materials. You also need to match them to your car. This section gives advice and tips from experts.
Types of Lug Nuts
There are many kinds of wheel lug nuts you can buy. Each kind fits certain wheels or cars. The table below shows common types, their features, and where you use them:
Conical vs. Spherical
You must match the seat type of your wheel lug nuts to your wheels. Conical seat nuts have a base shaped like a cone. Spherical seat nuts have a rounded base. Using the wrong seat type can make the wheel loose or damage it. Always check your car manual or ask a mechanic if you are not sure.
Open vs. Closed End
Open-ended nuts are good for racing or when you use long wheel studs. They let you check and change nuts quickly. Closed-ended nuts keep dirt and water out. This stops rust and keeps the wheel clean. Most cars use closed-ended nuts for everyday driving.
Titanium Wheel Lug Nuts
Benefits and Applications
Titanium wheel lug nuts offer a sophisticated blend of strength and weight reduction, serving as a high-performance alternative to traditional steel hardware. Because titanium is significantly lighter yet maintains immense structural integrity, these components reduce unsprung mass, which directly enhances vehicle handling and fuel efficiency. Unlike steel, which is prone to oxidation, this material naturally forms a protective surface layer that resists rust, salt, and harsh road chemicals. Consequently, while steel options often require replacement every few years due to corrosion or thread fatigue, a single set of titanium hardware can easily last over a decade, making them a sustainable and cost-effective choice for long-term ownership.
These fasteners are engineered to excel under extreme conditions, maintaining their shape and tensile strength across a vast temperature spectrum. This thermal stability prevents the nuts from becoming brittle in freezing winters or softening under the intense heat generated during track racing or heavy towing. Available in various configurations—including conical or spherical seats and open or closed ends—they provide a precise fit for both factory and aftermarket wheels. Their resistance to "galling" or sticking ensures that they remain easy to remove during emergency tire changes or routine maintenance, even after years of exposure to moisture and grime.
Safety remains a primary focus, with many premium options meeting rigorous ISO and IATF certification standards to ensure they withstand heavy loads and high-vibration environments without loosening. To maintain their integrity, it is recommended to use a manual torque wrench for the final tightening rather than an impact tool, which preserves the precision-machined threads. Beyond their mechanical advantages, these parts offer an aesthetic upgrade for show cars and enthusiasts, featuring polished or colored finishes that do not fade over time. Ultimately, by choosing this advanced material, drivers benefit from a reliable, recyclable, and low-maintenance solution that enhances both the security and the overall performance of their vehicle.
Matching Lug Nuts
Size and Thread Pitch
You must match the size and thread pitch of your wheel lug nuts to your car. Always check the maker’s guide or use a fitment chart. The table below shows what to look for:
Make sure your wheel lug nuts fit your car and wheels.
Use guides from the maker for fit details.
Ask a professional if you are not sure.
Before you drive, test the fit by hand-threading each nut onto the stud. The nuts should turn easily and sit flat against the wheel. If you feel resistance or see a gap, check your specs again. Never force a nut that does not fit.
Material and Finish
Pick wheel lug nuts made from strong materials. Alloy steel and titanium are good choices. The Wheel Hub Nut uses strong alloy steel and special coatings to stop rust. These coatings include hot-dip galvanizing, electro-galvanizing, and dacromet coating. These help stop rust, salt, and wear. You can use these nuts in many places and weather.
Always look for wheel lug nuts that meet safety rules. The Wheel Hub Nut follows ISO 9001 and IATF 16949. You can check these rules at ISO and IATF. Using certified nuts helps you stay safe.
Tip: Heavy-duty or titanium wheel lug nuts are extra safe for trucks, off-road vehicles, and fast cars. You can trust these materials to keep your wheels tight.
Always check the finish of your wheel lug nuts. A good finish stops rust and keeps your wheels looking nice. Pick a finish that matches your wheels and resists damage.
Final Checks and Maintenance
Inspecting Installation
Visual Inspection
You should always look at your wheels and lug nuts after you finish installation. Start by checking that each lug nut sits flat against the wheel. Make sure you do not see any gaps or uneven spaces. If you notice a nut that looks crooked or does not match the others, stop and fix it before you drive. Look for signs of rust, chipped paint, or metal shavings around the nuts. These signs can mean the nut is not tight or the threads have damage.
Use a flashlight if you work in a dark area. Good lighting helps you spot small problems. If you see any cracks in the wheel or lug nut, replace the damaged part right away. You should also check that the wheel sits evenly on the hub. A wheel that does not sit flat can cause shaking or noise when you drive.
Listening for Noises
After you install the wheels, listen for new sounds when you drive. Pay attention to clicking, rattling, or thumping noises near the wheels. These sounds can mean a lug nut is loose or the wheel is not seated right. If you hear a noise, stop as soon as it is safe and check the lug nuts again.
Tip: Drive slowly in a safe area after installation. Roll down your window and listen for any unusual sounds. This step helps you catch problems early.
If you hear a grinding or scraping sound, check for debris between the wheel and hub. Remove the wheel and clean both surfaces before reinstalling. Always trust your senses. If something feels or sounds wrong, inspect your work.
Maintenance Schedule
Replacement Timing
You should follow a regular schedule to check and replace your wheel lug nuts. Most experts recommend inspecting lug nuts every time you rotate your tires or change your oil. This habit helps you find problems before they become serious.
Replace lug nuts if you see rust, swelling, or stripped threads. If you drive in areas with a lot of salt or moisture, check your lug nuts more often. Heavy-duty vehicles or those used off-road may need more frequent checks. Always use a torque wrench to confirm the nuts stay tight.
Note: Industry standards, such as those from the Tire Industry Association, recommend replacing lug nuts at the first sign of damage. Do not wait for a failure.
By following these steps, you help keep your wheels secure and your vehicle safe. Regular checks and timely replacement prevent most wheel and lug nut problems.
You make your car safe by following the right steps for installing wheel lug nuts. Always use a torque wrench and look at the maker’s guide. Good products help you stay away from problems when driving. Check and clean your wheel lug nuts often to stop rust and damage. If you hear weird sounds or feel shaking, stop and check your wheels. If you are not sure or have tough problems, ask a pro for help.
Doing the steps right keeps your wheels tight and balanced.
The correct way stops shaking, uneven tire wear, and damage.
Using the right tools and torque makes your car safer.
FAQ
How often should you check your wheel lug nuts?
You should check your wheel lug nuts every time you rotate your tires or change your oil. Regular checks help you spot loose or damaged nuts before they cause problems.
What torque setting should you use for lug nuts?
Always use the torque value listed in your vehicle’s manual. If you cannot find it, check reliable sources like the Tire Industry Association. Using the correct torque keeps your wheels safe.
Can you reuse old lug nuts?
You can reuse old lug nuts if they show no signs of rust, swelling, or thread damage. Replace any nut that looks worn or damaged to avoid safety risks.
What should you do if a lug nut will not come off?
Try using penetrating oil and let it soak for a few minutes. If the nut stays stuck, use a lug nut removal tool. Never force it, as this can break the stud.
Why do you need to tighten lug nuts in a star pattern?
Tightening in a star pattern helps the wheel seat evenly against the hub. This method prevents warping and keeps the wheel secure.
How do you know if a lug nut is cross-threaded?
If a lug nut feels hard to turn by hand or does not sit flat, it may be cross-threaded. Remove it and check the threads for damage before reinstalling.
When should you replace all your lug nuts?
Replace all your lug nuts if you see rust, swelling, or stripped threads. If you drive in areas with lots of salt or moisture, check and replace them more often.
Can you use anti-seize compound on lug nuts?
You can use a small amount of anti-seize compound on the threads. This helps prevent sticking and makes future removal easier. Do not use too much, as it can affect torque readings.
Get Quote
Welcome To Know Our Products
Get Product and Service Information
Follow us
We provide OEM service and focus on stable quality, competitive pricing and responsive export support.


Contact Info
Add:Dongmingyang Industrial Park, Mingguan Town, Yongnian District, Handan City, Hebei Province China
Export salesman:
WhatsApp:+86 18830064300
E-mail: sales@hgtfix.com
Export salesman:
WhatsApp
+86 18830064300
E-mail:
Copyright © 2022 HEBEI YONGYI FASTENERS MANUFACTURING CO.,LTD Power by 300.cn | SEO