Welcome to Yongyi Fasteners, Your Reliable Fastener Supply Partner!

-
ProductsWe supply flat washers, spring washers, drop-in anchors, anchor bolts, hex nuts, hex bolts, sleeve anchors, threaded rods and OEM fastener products to DIN, BS, ANSI and MS standards.

-
About usHEBEI YONGYI FASTENERS MANUFACTURING CO.,LTD is located in China's largest fasteners production base Yongnian fasteners centre.
-
NewsHebei Yongyi Fasteners shares company updates, product knowledge and fastener industry news for global buyers.
-
ServiceThe products sold throughout the domestic and exported to Southeast Asia and Europe and other countries and regions. Our products win good reputation with domestic and foreign customers.



YONGYI FASTENERS
Support stable quality from material selection, processing and inspection to final delivery.
FOCUS ON HOT SPOTS


How to Install Hex Flange Head Bolts Without Mistakes
Published:
2026-04-10
Author:
YONGYI FASTENERS
Install hex flange head bolts correctly by using proper tools, following torque specs, and avoiding mistakes for a secure, lasting connection every time.
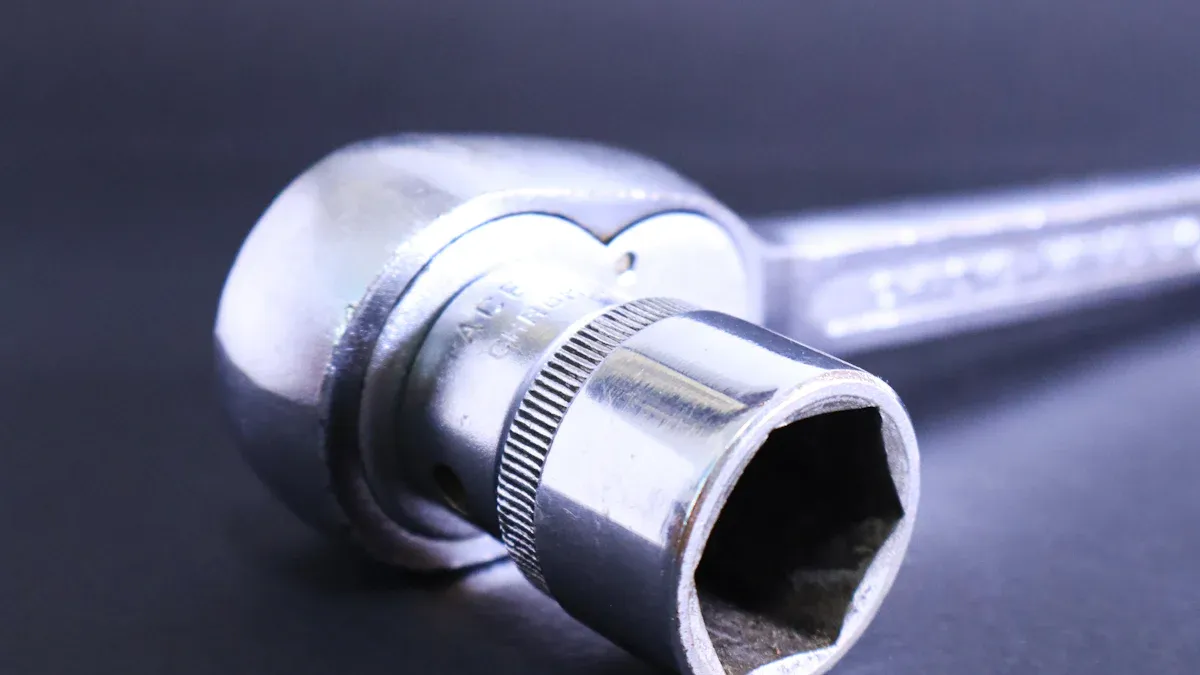
You should not make mistakes when you put in a hex flange head bolt. First, pick the right tools and check that your work area is clean. Use a good bolt that will not come loose for a safe connection in any job. When you put on a nut, choose ones with special locking features. This way, you will get a strong and safe installation each time.
Key Takeaways
Pick the right tools for putting in the bolts. Use wrenches and sockets that fit tightly. This stops damage to the bolt head.
Always clean your work area before starting. A clean space keeps dirt from causing problems.
Begin tightening hex flange head screws by hand. This helps them stay aligned and stops cross-threading.
Use a torque wrench to apply the right amount of force. Follow the manufacturer's instructions. This prevents over-tightening or under-tightening.
Choose flange lock bolts with anti-loosening features. These help keep the bolts tight, especially where there is lots of vibration.
Check the bolts often for wear or damage. Finding problems early can save money on repairs later.
Tighten the bolts in a crisscross pattern. This spreads the pressure evenly and stops joint failure.
Retighten the bolts after they are first used. Regular checks help keep the installation strong over time.
Tools & Materials
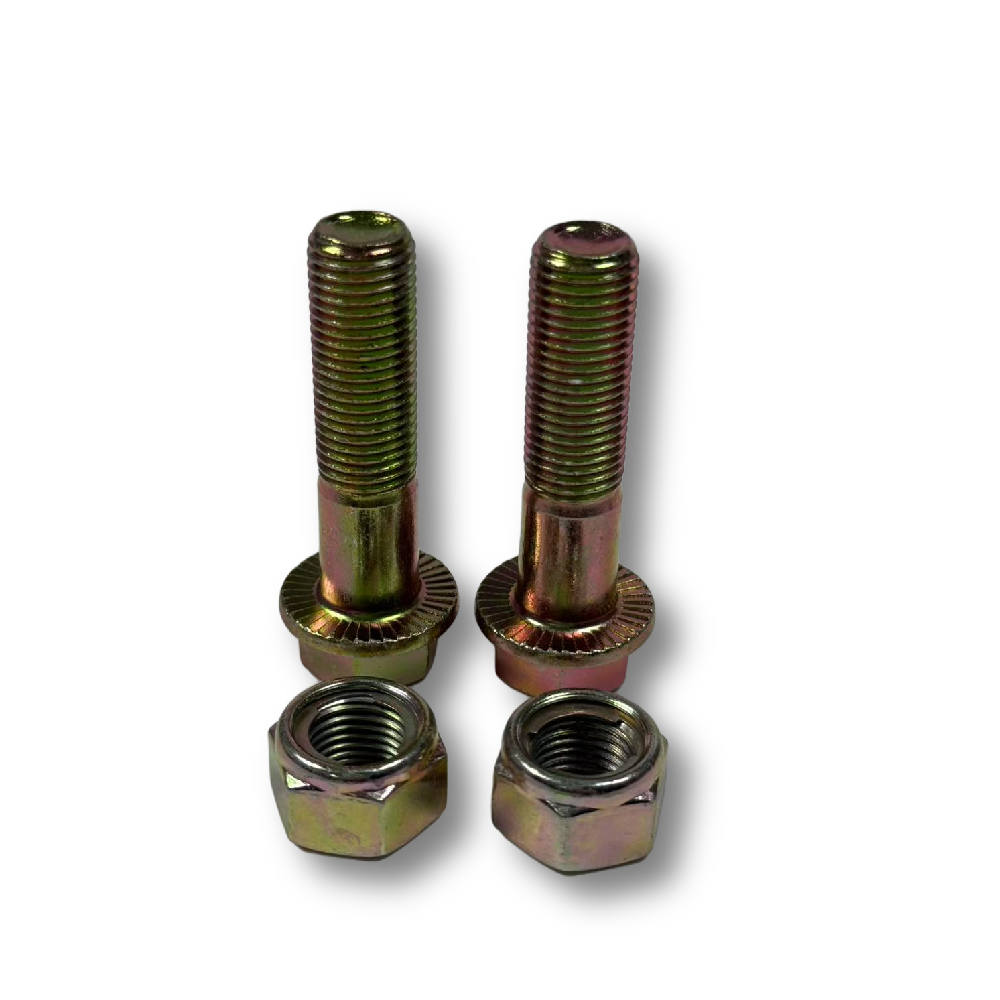
Before you start installing hex head screws, you need the right tools and materials. Using the correct equipment helps you avoid stripped threads, uneven tightening, or loose connections. Let’s break down what you need for a smooth installation.
Essential Tools
Wrenches & Sockets
You should always use a wrench or socket that matches the size of your hex head screws. A snug fit prevents rounding off the bolt head. For most jobs, a ratchet with the right socket makes the process faster. If you work in tight spaces, a combination wrench gives you better control. Make sure your tools are clean and free from oil or debris.
Torque Wrench
A torque wrench is a must for anyone who wants to avoid over-tightening or under-tightening hex head screws. This tool lets you set the exact force needed for each bolt. You can follow the manufacturer’s torque specs for your flange nuts and hex head screws. This step is key to safety and long-term performance.
Flange Lock Bolt Selection
Material Options
Choosing the right material for your hex head screws and flange nuts depends on your project. If you work in high-stress or heavy-duty settings, you need bolts with higher strength grades. Here’s a quick guide:
For outdoor or corrosive environments, pick stainless steel or carbon steel with a protective coating. Surface treatments like galvanizing or dacromet add extra resistance against rust. Always match your hex head screws and flange nuts to the demands of your job.
Anti-Loosening Features
Flange lock bolts come with built-in anti-loosening features. Serrated locking grips the surface and stops rotation. Nylon locking inserts add extra friction, keeping your hex head screws and flange nuts tight even when exposed to vibration. These features reduce the need for frequent retightening and lower the risk of failure in tough conditions.
Additional Supplies
Lock Washers
Lock washers add another layer of security. They help keep your hex head screws and flange nuts from backing out under load or vibration. You can use them in combination with flange nuts for extra holding power.
Thread Lockers
Thread lockers are liquid adhesives you apply to the threads before tightening. They harden to lock the hex head screws and flange nuts in place. This step is especially useful in machinery or vehicles that face constant movement.
Tip: Always check the compatibility of your thread locker with the material of your hex head screws and flange nuts. Some formulas work better with certain metals.
With these tools and materials, you set yourself up for a reliable, mistake-free installation. You get the best results when you match your hex head screws, flange nuts, and supplies to your specific application.
Work Area Prep
Getting your work area ready is the first step to a flawless hex flange head bolt installation. A clean, well-prepared surface and precise alignment make all the difference. Let’s break down what you need to do before you even pick up a bolt.
Surface Cleaning
Remove Debris
Start by clearing away anything that could get in the way. Use a wire brush or compressed air to sweep off cement slurry, dust, or any loose particles from the threads and surrounding surfaces. If you spot light rust, scrub it off with a brush or apply a bit of anti-rust solution. This step keeps the threads in top shape and helps you avoid problems when tightening the bolt.
Clean all exposed threads and surfaces.
Remove dust, cement, and laitance.
Treat light rust with a brush or anti-rust solution.
Make sure threads move freely.
A spotless surface means you get a tight, even fit. You also lower the risk of the bolt coming loose later.
Inspect for Damage
Look closely at the threads and the area where you’ll install the bolt. Check for dents, cracks, or any signs of wear. Damaged threads can mess up torque readings and lead to weak connections. If you see any issues, fix them before moving forward. You want every bolt to sit perfectly and hold strong.
Tip: Apply a small amount of lubricant to the threads. This helps prevent damage and lets you reach the right torque without extra force.
Component Alignment
Align Holes
Line up the holes in your components with care. Misaligned holes can cause cross-threading or make the bolt sit at an angle. Use alignment pins or a simple guide rod to help you get everything straight. Take your time here—rushing this step can lead to headaches later.
Check bolt position and projection height.
Make sure the bolt stands straight and fits the hole.
Compare spacing and location with your project drawings.
Mark Positions
Once you have everything lined up, mark the positions. Use a marker or chalk to note where each bolt will go. This step helps you keep track during installation, especially if you’re working with multiple bolts or large assemblies. Double-check your marks against your plans to avoid mistakes.
A well-prepped work area sets you up for success. Clean surfaces and perfect alignment mean your hex flange head bolts will perform at their best, even in tough conditions. You save time, avoid rework, and get a secure, lasting connection every time.
Hex Flange Head Bolt Positioning
Getting the right position for each hex flange head bolt is essential. You want a secure fit and zero mistakes. Let’s walk through the steps that help you avoid cross-threading and ensure your hex head screws and flange nuts sit perfectly every time.
Placement Steps
Start by Hand
You should always start hex head screws by hand. This gives you control and lets you feel if the threads catch correctly. Place the bolt into the hole and turn it slowly. If you feel resistance, stop and check the alignment. Hand-tightening helps you avoid damaging threads and keeps flange nuts from slipping.
Pick up the hex flange head bolt and insert it into the aligned hole.
Turn the hex head screws with your fingers until you feel them engage.
Make sure the flange nuts sit flush against the surface.
Tip: If you notice any wobble or uneven fit, pull the bolt out and realign. Never force hex head screws if they don’t turn smoothly.
Avoid Cross-Threading
Cross-threading can ruin your installation. You want every hex head screw to follow the threads cleanly. Here’s how you can prevent this common mistake:
Check the hole and threads for debris before you start.
Use alignment tools to keep the bolt straight.
Turn hex head screws slowly and watch for resistance.
If you feel a jam, back out the bolt and try again.
Cross-threading makes flange nuts hard to tighten and weakens the connection. You avoid costly repairs by taking your time with each hex head screw.
Flange Lock Bolt Alignment
Use Guides
Guides help you keep everything straight. You can use alignment pins or rods to line up the holes. This step is especially important when you work with multiple hex head screws and flange nuts. Guides make sure the flange lock bolt sits exactly where it should.
Insert alignment pins into the holes before placing the hex flange head bolt.
Check that the flange nuts line up with the bolt and the surface.
Use a guide rod if you need extra help with tricky angles.
The integrated design of the Flange Lock Bolt makes alignment easier. The flange washer and anti-loosening features keep the bolt steady as you position it.
Double-Check Fit
You should always double-check the fit before tightening. Look at the hex head screws and flange nuts to make sure they sit flush. If you see gaps or uneven surfaces, adjust the bolt. A perfect fit means the flange lock bolt will deliver maximum strength and reliability.
Inspect each hex head screw and flange nut for proper seating.
Confirm that the flange nuts are centered and not tilted.
Make small adjustments if needed.
Note: The anti-loosening features of the Flange Lock Bolt, like serrated locking and nylon inserts, help keep the bolt secure even if the installation faces vibration or impact.
You get a strong, mistake-free connection when you follow these steps. Proper positioning of hex flange head bolts, hex head screws, and flange nuts ensures your assembly stays tight and safe, no matter the conditions.
Step-by-Step Guide to Tightening
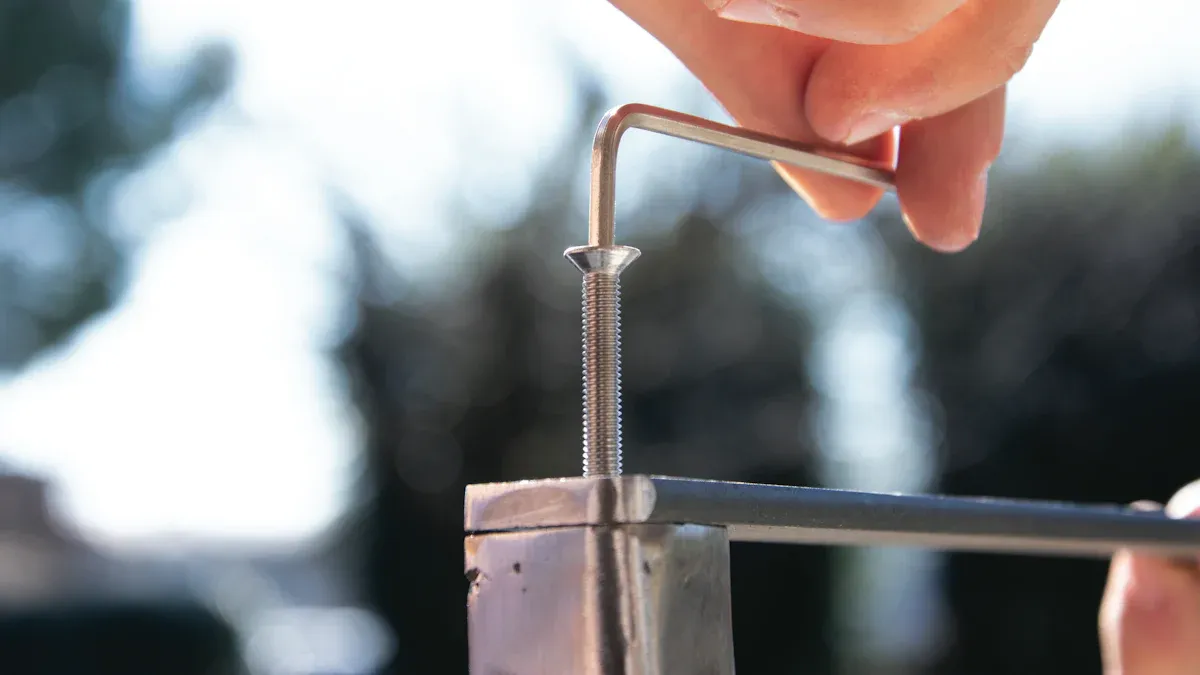
You want each hex flange head bolt to be strong and safe. This guide shows you how to get a tight fit and avoid mistakes.
Hand-Tightening
Initial Fit
Start by turning each bolt with your hand. You should feel the threads catch easily. This helps you see if the bolt lines up right. If it feels stuck, stop and fix the alignment. Hand-tightening makes sure the flange sits flat on the surface.
Smooth Engagement
Keep turning the bolt until it feels firm. Do not force the bolt or you might cross-thread it. The flange lock bolt’s design helps make this step simple. You get a good fit and avoid uneven pressure.
Torque Application
Set Correct Value
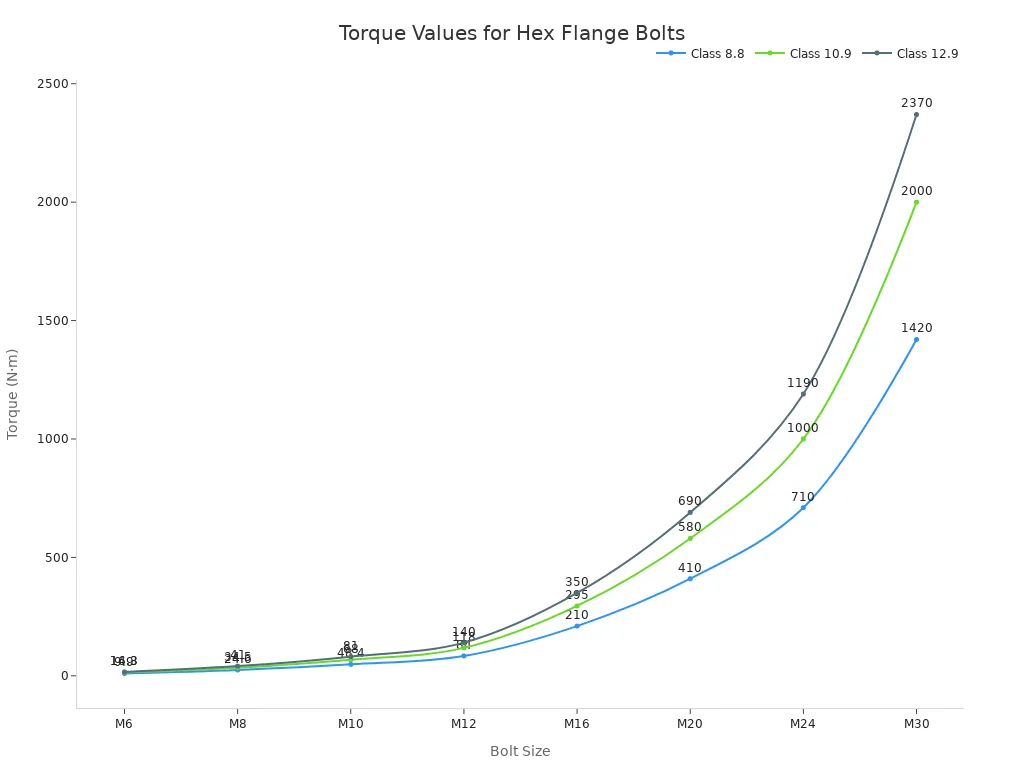
After you finish hand-tightening, use your torque wrench. Set the right torque for your bolt’s size and grade. Using the correct torque stops over-tightening or under-tightening. Both can cause the joint to fail or come loose. Here is a table with standard torque values:
You can see how torque changes for different sizes and grades in the chart below:
Follow Specs
Always use the torque the manufacturer says. This keeps the joint strong and lets anti-loosening features work. For important jobs, like cars or trains, use a calibrated torque wrench. Check ASME PCC-1 guidelines for the best ways to put bolts together.
Tip: If you need high torque, check the surface and material grade. This helps stop the bolt from stretching or the base from bending.
Tightening Patterns
Crisscross Sequence
Use a crisscross or star pattern when you tighten many bolts. This spreads the load evenly and stops stress from building up in one spot. Standards like ASME PCC-1 say to use these patterns for even clamping. Start at one bolt, then go to the one across from it, and keep going until all bolts are tight.
Gradual Stages
Tighten bolts a little at a time. Use less torque first, then more in later rounds. This helps the flange settle and keeps it from bending. Tightening in steps makes sure each bolt gets the right load.
Note: Following these steps makes your connection last longer and need less fixing. You get a safe, strong hold by using these tightening patterns.
Now you know how to install hex flange head bolts the right way. You avoid errors, get even pressure, and make your flange lock bolts work their best. For more details, check engineering research on bolted joint assembly.
Mistakes to Avoid
Over-Tightening
Risks
If you tighten hex flange head bolts too much, you can cause big problems. Too much force puts stress on the bolt and the material. This can make the bolt stretch or break. The threads can get damaged, so fixing things later is hard. The base material can bend, which makes the joint weak. If the coating cracks, rust can start.
The bolt can break or stretch.
Threads can get ruined.
The base can bend and get weak.
Cracked coating can let rust form.
You might think making it tighter is better, but that is not true. Too much torque makes the connection weaker. Studies show bolts need the right torque to stay safe, especially if there is vibration.
Prevention
You can stop over-tightening by using a torque wrench every time. Set the tool to the right number for your bolt size and grade. Check your settings before you begin. If you work where there is a lot of shaking, follow the torque rules from the manufacturer.
Tip: Stop tightening when you reach the right torque. If the bolt keeps turning easily, check for stripped threads or broken parts.
Under-Tightening
Consequences
Not tightening enough is also dangerous. If you do not use enough force, the bolt can get loose. This can make the joint rattle or move. You can lose clamping force, which can cause leaks or things to move out of place. The bolt and parts can wear out faster.
Joints can shake or move.
Clamping force can be lost.
Bolts and parts can wear out.
Loose bolts often fail in machines that move or shake a lot. You might hear noise, see gaps, or even have parts come apart.
Solutions
To stop under-tightening, always check the torque before you start. Use a torque wrench that is set right and follow the order for tightening bolts. If you use anti-loosening bolts with serrated or nylon locking, you get extra safety.
Note: After you finish, check the torque again after the first use, especially if the job is tough.
Wrong Tools
Compatibility
Using the wrong tool can hurt the bolt and the workpiece. Make sure your wrench or socket fits the bolt head just right. If it is too loose, it can round off the corners. If it is too small, it will not grip well.
Damage Prevention
Pick good tools that fit tight. Look at your tools for damage before each job. If you see slipping or uneven pressure, change to a better tool.
Only use clean, undamaged sockets and wrenches.
Do not use pliers or adjustable wrenches because they can slip and hurt you.
Using the right tools keeps your bolts strong and makes every job safer and better.
Skipping Checks
Skipping inspection steps is one of the most common mistakes you can make when installing hex flange head bolts. Even if you use the best tools and bolts, missing this step can lead to failures that cost time and money. Let’s break down why inspections matter and how you can do them right.
Inspection Steps
You should always follow a clear inspection routine after installing your bolts. This routine helps you catch problems before they turn into bigger issues. Here’s a simple checklist you can use:
Visual Inspection
Look at each bolt and flange. Check for gaps, uneven seating, or misalignment. The flange should sit flat against the surface. If you see any tilt or space, the bolt may not hold as intended.
Torque Verification
Use your torque wrench to confirm each bolt meets the specified value. Industry standards like DIN and ASME recommend rechecking torque after initial tightening, especially in high-vibration settings. If a bolt turns more than a few degrees, it was not tight enough.
Thread Engagement
Count the exposed threads. You should see at least two full threads past the nut or flange. Too few threads mean the bolt may not have enough grip.
Surface Condition
Check for scratches, rust, or debris around the bolt head and flange. Clean surfaces help maintain clamping force and prevent corrosion.
Tip: Create a habit of logging your inspection results. A simple table or checklist can help you track which bolts passed and which need attention.
What to Look For
You need to know the warning signs that something is wrong. Here’s what you should watch for during your checks:
Loose Bolts:
If you can turn a bolt by hand after tightening, it’s not secure. This often happens in machinery exposed to vibration, like agricultural equipment or rail transit systems.
Uneven Pressure:
Gaps under the flange or a bolt head that sits at an angle signal uneven clamping. This can lead to leaks or structural failure.
Corrosion or Wear:
Rust, pitting, or worn threads weaken the connection. In outdoor or harsh environments, these signs mean you need to replace the bolt or apply better surface treatments.
Signs of Movement:
Look for shiny spots or marks around the bolt. These show that the bolt has shifted under load, which can loosen the joint over time.
Damaged Anti-Loosening Features:
If you use Flange Lock Bolts with serrated or nylon locking, check that these features are intact. Worn or damaged locking elements reduce the bolt’s ability to resist vibration.
Regular inspections are not just a formality—they are your best defense against unexpected failures. Following these steps ensures your hex flange head bolts deliver reliable, long-lasting performance in any application.
Final Checks & Testing
You’ve tightened every bolt and followed the right sequence. Now, you need to make sure your installation will hold up under real-world conditions. This step is where you catch small issues before they become big problems.
Inspection
Visual Check
Start with a close look at each hex flange head bolt. You want to spot anything that doesn’t look right. Use this table to guide your inspection:
You can spot counterfeit or low-quality bolts with these checks. In industries like automotive or rail transit, using the wrong bolt can lead to costly failures.
Torque Verification
After the visual check, grab your torque wrench again. Go over each bolt and confirm it matches the recommended torque value. This step ensures you didn’t miss any bolts during the initial tightening. If a bolt turns more than a few degrees, it wasn’t tight enough. For critical applications, follow ASME PCC-1 guidelines for torque verification. This practice helps you maintain consistent clamping force and prevents joint loosening.
Security Testing
Load Test
You want to know if your installation can handle real stress. Apply a test load that matches the expected working conditions. For example, in machinery, you can run the equipment at low speed and check for movement or noise. In structural applications, use a calibrated load to simulate actual forces. If the joint holds steady, you’ve done the job right.
Monitor Loosening
Keep an eye on the bolts after the first use. Vibration, temperature changes, or heavy loads can cause even the best bolts to shift. Mark the bolt head and flange with a paint line. After a few hours or cycles, check if the lines still match. If you see movement, retighten the bolt to the correct torque. For high-vibration environments, consider periodic checks as part of your maintenance routine. You can find more on best practices for bolted joint monitoring in recent engineering research.
By following these final checks and tests, you ensure your hex flange head bolts and Flange Lock Bolts stay secure, reliable, and ready for any challenge.
Maintenance Tips
Taking care of your hex flange head bolts and Flange Lock Bolts helps you avoid problems later. Good maintenance lets you find issues early. It also keeps your bolts strong, even when things get tough.
Regular Inspection
Signs of Wear
Check your bolts often to keep them safe. Look for scratches or rust on the bolts. If you see cracks or a round bolt head, change the bolt. Watch places that shake a lot or get wet. These spots can wear out faster. If you use bolts in machines or cars, check them after long trips or heavy work.
Look for rust, pitting, or color changes.
Check if bolts are loose or if parts move.
Watch for broken anti-loosening features like nylon inserts or serrations.
Retightening
Bolts can get loose over time, especially with shaking or heavy loads. Use a torque wrench to check if the bolts are tight enough. If a bolt turns more than a little, tighten it to the right torque. Always use the same tightening pattern as before. This keeps pressure even and stops new problems.
Tip: Check your bolts every few months or after big jobs. This easy step can stop bigger problems later.
Corrosion Prevention
Surface Treatments
Bolts can rust fast outside or in harsh places. You can stop rust by picking the right surface treatment. Here is a simple guide to good choices:
If you work near the sea or in rainy places, these treatments help a lot. Washing bolts with fresh water also removes salt and dirt that cause rust.
Lubrication
Lubrication helps bolts move well and stops rust. Put anti-seize on threads before you install bolts. This lowers friction and makes bolts easier to remove later. If you hear squeaks or feel stiffness, add more lubricant. Always use products that match your bolt’s material and coating.
Lubricate threads before you tighten bolts.
Add more lubricant during checks if needed.
Do not use oil or grease that collects dust or dirt.
Note: Change any damaged or worn bolts right away to keep your system safe.
If you follow these tips, your hex flange head bolts and Flange Lock Bolts will last longer and work better. Regular checks, good surface treatments, and smart lubrication protect your bolts and keep your equipment working well.
You now understand how to put in a hex flange head bolt the right way. First, clean your work area before you start. Use the right tools for the job. Always follow the torque numbers for each hex flange head bolt. Using the best bolt, nut, and washer helps a lot. Look at this simple table to see what works best:
Check your bolts often and take care of them. This helps bolts last longer and keeps things safe. If you pick strong products like Flange Lock Bolt, you can trust your work every time.
Picking the right bolt, using the right torque, and adding lubricant make bolts last longer.
Taking care of bolts keeps your machines safe and follows the rules.
Pay attention, do not skip steps, and your bolts will stay strong for a long time.
FAQ
What makes a Flange Lock Bolt different from a regular hex bolt?
A Flange Lock Bolt has a built-in flange washer. It also has special features that stop it from coming loose, like serrated or nylon locking. This design spreads out the force and fights vibration. It keeps your connection tight, even when things get rough.
Can I reuse Flange Lock Bolts after removal?
You can use them again if the threads and locking parts look good. Always check for damage or bent pieces. If you see stripped threads or worn locking parts, get a new bolt to stay safe.
How do I know which surface treatment to choose?
Pick galvanizing if you work outside. Use Dacromet if chemicals are around. Hot-dip galvanizing is best for places near the sea. Match the treatment to where you use the bolt. This stops rust and helps bolts last longer.
Do I need a torque wrench for every installation?
Yes, you should use a torque wrench each time. This tool helps you get the right tightness. It stops you from making bolts too tight or too loose. Both mistakes can make bolts fail.
What should I do if a bolt keeps loosening?
Check for shaking, worn locking parts, or wrong torque. Try a Flange Lock Bolt with serrated or nylon locking. If it still gets loose, look at the joint for problems with fit or material.
Are Flange Lock Bolts suitable for high-vibration machinery?
Yes, they work well in machines that shake a lot. The anti-loosening design, like serrations and nylon inserts, keeps bolts tight in engines, trains, and big machines. You get strong bolts even when things move all the time.
How often should I inspect installed bolts?
Check bolts every few months or after heavy use. Look for rust, damage, or loose bolts. If you work outside or in places with lots of shaking, check more often to find problems early.
Can I use the thread locker with Flange Lock Bolts?
You can use a thread locker for extra safety. Many Flange Lock Bolts already have anti-loosening features. Always make sure the thread locker works with your bolt’s material and job.
Get Quote
Welcome To Know Our Products
Get Product and Service Information
Follow us
We provide OEM service and focus on stable quality, competitive pricing and responsive export support.


Contact Info
Add:Dongmingyang Industrial Park, Mingguan Town, Yongnian District, Handan City, Hebei Province China
Export salesman:
WhatsApp:+86 18830064300
E-mail: sales@hgtfix.com
Export salesman:
WhatsApp
+86 18830064300
E-mail:
Copyright © 2022 HEBEI YONGYI FASTENERS MANUFACTURING CO.,LTD Power by 300.cn | SEO